500 miles, 800公里, 从Dayton OH到Clemson SC, 从小城市到小镇,从北边到南边,从EO到CE,做了好大的转变,继续前行. 本以为孤家寡人没什么行李,结果拾掇拾掇整理出一堆,车后座堆到一人高,垃圾还是攒的很多. 小潘曾给我看的一个老头的talkshow, "My shit is stuff, their stuff is shit", 还是有些应景. 路上9个小时,前半段一直在下雨,路上就是在山里面绕来绕去,路很窄,上上下下的. 南方天气又潮又热,我这个浙江人在ohio呆了这么久都已经忘了家乡的夏天了,颇有些不习惯.
房子是已经联系好的, 2 bedroom town house, 挺满意的, 室友人很好. 环境非常乡下, 好像就是在丛林中开辟出来的一条小道和一片房子. 公交车免费, 去学校转了转, 大太阳底下按照地图找房子,更何况没有东南西北的意识,很晕,以后熟悉了就好了吧. 中午吃的是asian express, 白饭加两个炒得发甜的肉,已经是惊喜了,这比光汉堡皮萨好多了.
实验室的人都还没到,老板还在外地开会,系里的小秘没找到,这周可以过几天自在日子,下周就要开始忙了.
Thursday, August 06, 2009
Tuesday, August 04, 2009
wpa wireless setup in gentoo
Reference: http://www.thinkwiki.org/wiki/How_to_install_wpa_supplicant
1. # echo "net-wireless/wpa_supplicant madwifi" >> /etc/portage/package.use
2. # emerge -av wpa_supplicant
3. # wpa_passphrase "ssid" "wpa_passphrase" % get the psk
4. % create /etc/wpa_supplicant.conf
# cat /etc/wpa_supplicant.conf
ctrl_interface=/var/run/wpa_supplicant
ctrl_interface_group=0
eapol_version=1
# ap_scan=1 was the one for me you may try 0 or 2 indstead of 1
ap_scan=1
fast_reauth=1
network={
ssid="ssid"
proto=WPA
key_mgmt=WPA-PSK
pairwise=TKIP
group=TKIP
#psk="passphrase"
psk=xxxxx # a bunch of numbers and letters from wpa_passphrase
}
To start the network:
1. # ifconfig ath0 up
2. # wpa_supplicant -B -c /etc/wpa_supplicant.conf -iath0 -Dmadwifi
%% -B is the daemon mode, -d is the live mode
3. dhcpcd ath0
%% if dhcpcd has a time out, use `iwlist ath0 scan' to check the channel number and then change (ap_scan) in the config file. restart wpa_supplicant (if it's in daemon mode, kill the process and then restart)
Sunday, July 19, 2009
浙江大学校歌MTV
浙江大学校歌
大不自多,海纳江河。惟学无际,际于天地。
形上谓道兮,形下谓器。礼主别异兮,乐主和同。
知其不二兮,尔听斯聪。国有成均,在浙之滨。
昔言求是,实启尔求真。习坎示教,始见经纶。
无曰已是,无曰遂真。靡革匪因,靡故匪新。
何以新之?开物前民。嗟尔髦士,尚其有闻。
念哉典学,思睿观通。有文有质,有农有工。
兼总条贯,知至知终。成章乃达,若金之在熔。
尚亨于野,无吝于宗。树我邦国,天下来同。
Tuesday, April 07, 2009
TestDisk saves my ass !!!
Today I accidentally did a "rm -rf *" under a folder, SHOOT!!! This is a FAT32 partition. Then I quickly unmount it and google for solution.
Then TestDisk comes to me and saves my ass! http://www.cgsecurity.org/wiki/TestDisk I emerged testdisk from gentoo portage and uses 'photorec' to undelete files. The recovered files are named randomly with a correct suffix. That's very enough for me. Great tools!
Thank this blog entry:
http://blog.lxpages.com/2007/06/21/linux-file-recovery/
BTW: for NTFS partition, ntfsundelete is useful, it's included in ntfsprogs package.
Saturday, March 28, 2009
Running concurrent ML on smlnj
Check this wiki page:
http://en.wikipedia.org/wiki/Concurrent_ML
Note: 'heap2exec' is currently supported on ppc-unix (Mac OS X), and x86-unix (no amd64 support). It requires heap2asm, which is not installed by default. It can be added by editing config/targets
http://en.wikipedia.org/wiki/Concurrent_ML
Note: 'heap2exec' is currently supported on ppc-unix (Mac OS X), and x86-unix (no amd64 support). It requires heap2asm, which is not installed by default. It can be added by editing config/targets
Monday, January 19, 2009
快过年了
离多聚少人寂寂,冬去春来柳纷纷.
500 Miles
If you miss the train I'm on
You will know that I am gone
You can hear the whistle blow a hundred miles
A hundred miles, a hundred miles, a hundred miles,
a hundred miles
You can hear the whistle blow a hundred miles
Lord, I'm one, Lord, I'm two, Lord, I'm three
Lord, I'm four, Lord, I'm five hundred miles from my home
Five hundred miles, five hundred miles, five hundred miles
five hundred miles
Lord, I'm five hundred miles from my home
Not a shirt on my back, not a penny to my name
Lord, I can't go back home this a way
This away, this away, this away, this away
Lord I can't go back home this away
If you miss the train I'm on
You will know that I am gone
You can hear the whistle blow a hundred miles
A hundred miles, a hundred miles, a hundred miles,
a hundred miles
You can hear the whistle blow a hundred miles
Thursday, January 01, 2009
zz Recovering Deleted Files in Linux
Brian Buckeye and Kevin Liston
Most systems administrators have experienced a situation where a vital file has accidentally been deleted without a recent backup. In this article, we’ll explore how to recover files in Linux. To begin, however, there are several caveats:
1. The methods described are emergency measures. They do not replace a working backup process to protect your data. You should also consider version control methods to protect your data from accidents.
2. File recovery is usually a time-consuming process, and often is not completely successful. Once a file is deleted, the space it occupied on the hard drive is marked as “available” and can be overwritten. DO NOT install any file recovery software on the drive that houses the file you want to recover.
3. These data recovery techniques involve elements of luck and timing, in addition to technique. If you’ve suffered an accidental deletion in the first place, luck isn’t necessarily on your side.
4. Even if you do recover the file, there is no guarantee that it will have the same information that was contained in the original. Inspect anything you retrieve and verify the information before you use it in production.
5. There are several factors acting against a successful recovery, including: time, file size, congestion of the disk partition, and the system activity:
• The more time that passes between the deletion of the file and the initiation of the recovery process, the less likely the process will succeed.
• The larger the size of the deleted file, the more likely damage has occurred.
• The more active the system, the more likely the blocks freed by the deletion will be overwritten by new data.
• If there is little free space on the disk partition, the smaller pool of available blocks increases the chance that the deleted data blocks will be re-used.
With those caveats in mind, we’ll examine some options.
Linux and ext2
The default file system used by Linux is the Second Extended File system, referred to as ext2. (Ext3 with its use of journaling has also recently become common, but we will not cover it in this article.) The role of the file system itself is to abstract the physical structure of the storage media. On a physical level, a drive is a series of 512-byte sectors, addressable from 0 to n-1. The file system is responsible for organizing these sectors into files and directories eventually used by applications via the operating system.
Blocks
The Linux file system, ext2, collects sectors into blocks. Ext2 supports block sizes of 1024, 2048, and 4096 bytes. Blocks are organized into block groups. Blocks are either data blocks or superblocks. Data blocks are general-purpose blocks used to store files and directories. Superblocks reside on the border of block groups and contain settings and status of the file system (e.g., formatting and cleanliness state). Block groups consist of a superblock, block allocation bitmap, inode allocation bitmap, inode table, and data blocks. Block groups are usually organized into 8*block-size blocks (e.g., 8192 blocks in a 1024-byte block-sized system). The block allocation bitmap keeps track of which blocks in the block group are in use (allocated vs. free). Our 1024-byte block size example has 1024 bytes responsible for tracking 8192 blocks. Thus, each block is mapped to one bit in the bitmap. (A “1” denotes allocated and a “0” denotes the block to be free.) The make-up of a block group includes a superblock, block allocation bitmap, inode bitmap, inode table, and data blocks.
The inode allocation bitmap work similarly, but typically uses less space than allocated, unless you have defined the system to have one inode per data block (which would be the case in a system optimized to handle a large amount of small files such as a news server). Inodes are special data-structures, each 128 bytes in length, which represent a file. By default, mke2fs (used to format an ext2 partition) reserves an inode for every 4096 bytes of file system space. The first ten inodes in a file system are special purpose:
1 — Bad blocks inode
2 — Root inode
3 — acl index inode (not supported)
4 — acl data inode (not supported)
5 — Boot loader inode
6 — Undelete directory inode (not implemented)
7-10 — Reserved
The bad blocks inode lists all of the data blocks on the file system that have detected unrecoverable errors. The root inode points to the directory file of /. The acl-related and undelete directory inodes are currently not implemented.
Pointers
Inodes contain information about a file, such as modification, access, creation (and deletion) time, ownership, permissions, size, and pointers to the actual data blocks of the file. There are 15 pointers to data blocks; the first 12 are references to direct blocks (actual file-data). The 13th pointer references the indirect block, which is a data block containing a list of 4-byte pointers to direct blocks (i.e., another 256 direct blocks in a 1024-byte block-sized system, 1024 direct blocks in a 4096-byte block-sized inode). The 14th pointer references the doubly indirect block, which is a block containing pointers to 256 (in the case of a 1024-byte block-sized file system) indirect blocks. In other words, the 14th pointer serves as the root of a tree that references 65536 data blocks in a 1024-byte block-sized file-system. The 15th pointer points to the triply indirect block, or a block full of references to doubly indirect blocks. In other words, this forms an asymmetrical tree-structure, where the inode references 15 children, the first 12 are terminal, the 13th has 1 level, the 14th has 2 levels, and the 15th has 3 levels. This causes the 1.6-GB file-size limit on 1024-byte block-sized systems.
Everything is a File
In Linux, directories are simply special files. The second inode in the file system points to /. This directory links to other subdirectories (which are other directory files). Directories are simply lists of four-tuples, consisting of an inode number, entry length, name length, and filename. The entry length denotes the length of the directory entry itself. This structure allows the use of long filenames without wasting disk space, but there is some waste from directories due to block size. This is why you see a size such as 1024 for . and .. in the output of ls -la.
Also implemented with Linux is the /proc pseudo filesystem. Staying consistent with the UNIX everything-is-a-file metaphor, the /proc directory allows access to kernel data structures. The process structures are handy for data recovery. As root, change directory to /proc/
The exe link is an actual pointer to the file that is being executed. The fs link is a directory of file descriptors currently opened or in-use by the process. Every process will have at least three, which are listed first and denote STDIN, STDOUT, and STDERR, respectively. Other possible entries are network sockets (e.g., 20 -> \socket:[450], or port 450) and files (e.g., 4 ->/home/kliston/.list.swp).
In Linux, each inode keeps track of a file’s link count, which is the number of times that a directory lists the inode. When a file is deleted, its entry is removed from the directory file and the inode’s link count is decremented. If this link is reduced to 0, then the inode is marked as “free” in the inode bitmap, and all of the blocks referenced by that inode are marked as “free” in the block bitmap. The deletion time field is set in the inode. The OS also keeps track of the processes linked to an inode. This can be used to your advantage if you are notified of the accidental deletion in time.
Getting Your Files Back
This all may be interesting, but you still need to know how to get your files back. The first step is determining how important the information is, and how vital it is to get it back intact. In Linux, there are a few things you can try before mounting the affected partition in read-only mode.
If you need to recover an executable that happens to be currently running (such as in a forensics case where an intruder has a backdoor running, but has deleted it to cover his tracks), you can recover simply with:
cp /proc/415/exe /tmp/backdoor
If you have a process running that references a recently deleted file, you can try similar tricks with the /proc/
/proc/415/fd/4 -> /home/kliston/.list.swp
This happened to be the swap file from a vi session. Performing strings 4 returned the contents of /home/kliston/list with some garbage as the header. Using the /proc/
ls -l [0-9]*/fd|grep
If you’re not lucky enough to have a case that can be solved by using the /proc recovery techniques, you need to cease write activity to the affected partition. Our examples will be recovering data from /home or /dev/hdc6.
Remount the partition in read-only mode:
mount -o ro,remount -n /home
This will allow you to access the system and stop processes from overwriting your to-be-recovered data blocks. The -n flag instructs mount to not write to /etc/mtab, enabling you to recover data from partitions that contain /etc, such as /.
There are a few factors that can be used to gauge your chances for success. Before kernel 2.2.x, the indirect inode pointers (pointers 13 and above) were also zeroed out when a file was deleted. If you are working with a kernel older than 2.2.0 (use uname -r to find out), you’re limited to the file size that you can recover using a direct inode reference technique. This recoverable limit is 12*block size. You can pull the system’s block size from the superblock by doing the following (where /dev/hdc6 is an example file system):
echo stats|debugfs /dev/hdc6
These examples were performed on a system running kernel version 2.2.19-6. The file system had a block size of 4096 and 10 block groups. Files were recovered from the /dev/hdc6 partition using /home as a mount point. The server saw low-to-moderate activity as a general-purpose server in a home/lab environment.
Using the debugfs utility, you can generate a list of deleted inodes, or inodes that have a non-zero time in their “Deleted Time” field. Generate a list of deleted inodes:
echo lsdel | /sbin/debugfs /dev/hdc6 > /tmp/lsdel.out
This generates an output similar to:
debugfs:   7344 deleted inodes found.

Inode   Owner Mode      Size   Blocks   Time deleted
62984   511   100600   12288   3/   3   Thu Dec 27  10:38:44 2001
62980   511   100644     693   1/   1   Thu Dec 27  10:39:09 2001
110212  511   100644 2123710   520/ 520 Thu Dec 27  10:54:35 2001
Needless to say, a lot of entries were omitted, and we’ve only shown the last three that belong to our user id since that’s what we’re interested in. To examine these files a bit more, use the stat command in debugfs to pull additional information about the file referenced by the inode:
debugfs /dev/hdc6
> stat <110212>
This will return the link count (probably 0), the creation, access, modify, and deletion times, and a list of all of the blocks that make up the file. This information will determine whether this inode is your candidate. To actually recover the data, use debugfs to dump the data to which the inode is pointing to a new file:
debugfs /dev/hdc6
dump <110212> /tmp/recovered
To recover all three of these files, edit /tmp/lsdel.out down to the desired files as /tmp/lsdel.edited and do something like this:
     awk '{print $1}' /tmp/lsdel.edited > /tmp/inodes
    for i in $(cat /tmp/inodes); do echo <$i> \
       -p /tmp/recovered.$u\i" | debugfs
/dev/hdc6; done
This creates a series of files in /tmp, but there is still the task of discovering their names and where to place them.
An alternative method (which is more risky but can work when you don’t have another partition to restore to, and this is rarely the case) involves directly editing the inode itself. Zero-out the deletion date and create a link to the inode (both raising the link count to one, and providing an access point in a directory):
debugfs -w /dev/hdc6
> mi <110212>
This action will walk us through the settings of the inode. It will show the current setting and offer to change it. Press “Return” to accept the current (or default) setting. When you arrive at the “Deleted Time” field, enter “0” and then continue accepting the rest of the settings. Then, change directory to where you want to link the file. Note that the top directory in debugfs will be the mount point, /home in our example:
> cd kliston/
> link <110212> recovered_file
It is important to unmount the altered partition and run fsck upon it. It will discover that there are blocks that are marked as free in the block allocation table, yet linked to an active inode. Let fsck make the required fixes. Now your file will remain safe, otherwise the data blocks will still be marked as available and eventually other files will reuse them and corrupt data.
It is simply a matter of chance should these techniques work. In test recoveries, we were able to help successfully recover log files on December 27th that had been deleted on October 11th. This was from a low-to-mid-use home/lab server, so these results are probably atypical.
Known-Text Recovery
What if the file wasn’t rmed? What if your unfortunate user typed:
cat /dev/null > important_file
In this case, the inode isn’t deleted but all of the data block pointers are zeroed and the data blocks are freed up in the block allocation bitmap. The odds of recovery have just decreased by an order of magnitude, but there are some other options.
The “known-text recovery method” is more of an art than a science and is less likely to succeed, but it has the advantage of working on file systems other than ext2 (such as Solaris’s ufs). This technique involves searching for a known pattern through an image of the affected file system. The pattern should be unique to the file that needs restoration. Crafting the search pattern is the artistic part of the process. A poorly written pattern can return too many hits, or no hits at all.
The example here involves recovering a DNS database file from the catastrophic cat /dev/null > important_domain.com.db. Because we’re looking for a bind data file, we could search on a pattern containing “IN SOA”, or for a known host of the missing domain.
The first active step involved in this technique is the creation of the recovery copy of the partition. By this time, the partition should have already been unmounted, or mounted read-only (see above techniques). Copy the partition to another file system (which must be large enough to hold the affected partition) with a command such as:
dd if=/dev/hdc6 of=/opt/hdc6.image
Apply an fgrep filter to locate the pattern (a unique hostname, in this case) in the recovery image:
fgrep "elmenop" /opt/hdc6.image
Here, we’re looking for the domain record that defined elmenop.important_domain.com. In the test case, this returned most of the domain record surrounded by nulls. It probably recovered unused space from a temporary file that referenced the file, rather than the file itself. If you need to search or use regular expressions, you can use egrep in lieu of fgrep, which will output all instances of your search pattern. Then, based on either knowledge, or trial and error, use fgrep’s -A and -B flags to pull a slice out of your recovery copy into (hopefully) an editable file that can be cleaned up for use.
The -A flag denotes how many lines after the match to print, and -B instructs how many lines before the match that grep will print. In the example, elmenop is a hostname that appears in the domain file. Using some guesswork (based on inspecting other domain data files that were not deleted), there is a window size of seven lines before, and ten lines after. There is added buffer room to our estimates to increase the odds of grabbing all of the usable data in one pass. In this special case, we lacked physical access to the server, and we didn’t have enough space to create a recovery copy, so the action was performed on a live pattern (not recommended unless you’re intentionally pushing your luck as we were):
dd if=/dev/hdc6 | fgrep -B 7 -A 10 --text "elmenop" > \
 /tmp/pattern_match.1
This approach created an editable output, capable of rebuilding the original file. This was successful after cat /dev/null > important_domain.com.db was used to “destroy” the file. The recovery attempt was made less than 24 hours later only to find that the data blocks had been overwritten. Once again, we find that time is not your friend when it comes to data recovery.
Recovery Tools
Are there programs out there to make this any easier? Absolutely. But, as sys admins, we know that you need at least three ways to fix a problem — none of them will work, but they’ll give you an idea for a fourth way that probably will. Taking time to work through the abstraction of the operating system and understand what is happening at a lower level may help you see the problem differently. Tools tend to hide what is going on and may blind you to another answer. Realistically, working through the problem yourself is not always the most expeditious path. These tools may make administration a little easier for you:
The Coroner’s Toolkit
(http://www.fish.com/tct) — A collection of tools originally created for computer forensics work. It includes the data recovery tools unrm and lazarus, both of which can be used to recover accidentally deleted data.
The Recover Tool
(http://recover.sourceforge.net) — Automates the direct inode recovery technique described above. It’s good to use if you have a large number of files to recover.
Conclusion
In the end, retrieving a file on Linux comes down to luck, timing, luck, technique, and luck. Most file recovery tools are fairly inexpensive and easily available and should be a standard part of any systems administrator’s toolbox. So, the next time a user accidentally deletes that vital file, you can say, “Relax, it’s probably already too late. But maybe, just maybe, there’s something I can do.”
References
Ferlito, John and Widdowson, Liam. “Tales from the Abyss: UNIX File Recovery,” Sys Admin magazine, November 2001:
Mandia, Kevin and Prossise, Chris. Incident Response: Investigating Computer Crime. Osborne/McGraw Hill, New York 2001.
Wall, Kurt, Watson, Mark, and Whitis, Mark. Linux Programming Unleashed. Sams, 1999.
Ext2 file Undeletion: http://www.billjonas.com/papers/undeletion.html
Crane, Aaron. Linux Ext2fs Undeletion mini-HOWTO: http://www.praeclarus.demon.co.uk/tech/e2-undel/howto.txt
Card, Remy, Ts’o,Theodore, and Tweedie, Stephen. Design and Implementation of the Second Extended Filesystem: http://e2fsprogs.sourceforge.net/ext2intro.htm
Oxman, Gadi. The extended-2 filesystem overview: http://www.nondot.org/sabre/os/files/FileSystems/Ext2fs-overview-0.1.pdf
Brian Buckeye is the Director of IT for a medium sized Ohio business. He can be reached at: brian@blindpanic.com.
Kevin Liston is a consulting security engineer. He can be reached at: kliston@infornographic.com.
Saturday, December 27, 2008
some tips
- "\ls" will use the raw "ls" instead of the aliased one
- in Android, if two projects with the same package name are created in Eclipse, they are not going to co-exist on the emulator, the later-installed apk will overwrite the earlier one.
- resue damaged hard drive:
dd bs=512 conv=noerror,sync if=/dev/hda of=/some_dir/foo.image
Also can use gzip or bzip2 to compress. - FAT32 can only allow a maximum file size of 4GB. So when doing the data rescue with a destination of FAT32 partition, it will show "stdout: file too large" when the image file reaches 4G. It's not the gzip or bzip2 problem. Solution is to change the file system. BTW: better stay away from HFS, an Apple monoply file system, except some frenetic apple fans who are using HFS for all their drives.
- On an Apple iBook G4, hold down 'Option' key when it boots, will let you choose the boot media. If having trouble ejecting a disc, ultimate solution is to restart the computer while holding down the trackpad button.
- The hfsplus file system is supported in linux kernel, which has to be selected. The location is 'File systems -> Miscellaneous filesystems -> Apple xxxx support'.
- To burn an toast image under windows: use daemon-tools to mount the toast image, then use DVD burn software to copy from the virtual device to the destination DVD-RAM. Windows is not able to read files from the toast image.
- convert dmg file to iso (under mac os x)
hdiutil convert /path/to/filename.dmg -format UDTO -o /path/to/savefile.iso
It will add a .cdr suffix. Just rename it to iso. xargswith blank space in file name. The GNUxargs(used on Linux) has a-0(zero) option; this means the pathnames it reads are separated by NUL characters instead of whitespace. GNU'sfind(also used by Linux) has a-print0operator that puts a NUL between pathnames instead of a newline. Use them together like this:
Here is a good article on find/xargs.find . -type f -mtime +7 -print0 | xargs -0 rm
Tuesday, November 18, 2008
The art of font selection.
Recently I am reading the manual of latex-beamer, because I want to use it for presentation. There is a chapter called `Guidelines for Creating Presentations' in beameruserguide.pdf, which is worth reading line by line. Besides guide lines for presentation, it describes cons and pros of various fonts and how to select appropriate ones. There is art in font selection. Well, everyone who has played with linux desktop optimization will agree. But it is still interesting to read the user guide.
For example, in the small caps part, it first states the disadvantage of uppercase text.
Then it adds
For example, in the small caps part, it first states the disadvantage of uppercase text.
Text typeset in small caps is harder to read than normal text. The reason is that we read by seeing the “shape” of words. For example, the word “shape” is mainly recognized by seing one normal letter, one ascending letter, a normal letter, one descending letter, and a normal letter. One has much more trouble spotting a misspelling like “shepe” than “spape”. Small caps destroy the shape of words since shape, shepe and spape all have the same shape, thus making it much harder to tell them apart. Your audience will read small caps more slowly than normal text.
Then it adds
This is, by the way, why legal disclaimers are often written in uppercase letters: not to make them appear more important to you, but to make them much harder to actually read.
Wednesday, October 15, 2008
Great Article on Linux dd command
Author: AwesomeMachine @ LinuxQuestions.org
original link
I followed the instructions to create an image for my windows drive. It's killing me to reinstall xp.
creating backup image
original link
I followed the instructions to create an image for my windows drive. It's killing me to reinstall xp.
creating backup image
restoring imagedd if=/dev/hda1 | bzip2 > /home/winxp.image.bz2
dd if=/home/winxp.image.bz2 | bunzip2 | dd of=/dev/hda1
Compiz Fusion: a not recommend configuration
UPDATE: Hooooray!! The border is on after I add the `decoration` plugin to the very last line of /usr/bin/compiz-start. Also I change this file to use `emerald` instead of `gtk-window-decorator` and it works!!!! So I know one thing, can't fully trust `ccsm` and always turn to reliable command line. Oh, if `emerald --replace` has no output, no error, it's probably means it's working. Compiz fusion rocks! Even better if I can have a better video card~
Compiz Fusion is not working perfectly on my gentoo. First of all, no window border. After several days googling, I gave up. A note, if `emerald --replace` or `gtk-window-decorator --replace` is working fine, then that's the compiz configuration problem. My case is that these two commands does nothing, no output, no change, no error. But I can live with that.
Second problem that took me a long time is the configuration. The setting in `ccsm` does not take effect and even cause a compiz segmentation error. Then I used a brute force configuration. Not recommended, only for desperate people.
APPENDIX:
Compiz Fusion is not working perfectly on my gentoo. First of all, no window border. After several days googling, I gave up. A note, if `emerald --replace` or `gtk-window-decorator --replace` is working fine, then that's the compiz configuration problem. My case is that these two commands does nothing, no output, no change, no error. But I can live with that.
Second problem that took me a long time is the configuration. The setting in `ccsm` does not take effect and even cause a compiz segmentation error. Then I used a brute force configuration. Not recommended, only for desperate people.
- gain root privilege
- use `ccsm` to determine which plugins should be needed, the plugin name can be found in Preferences | plugins list.
- modify the last line of /usr/bin/compiz-start, delete "gconf", add all the plugins you want to enable. Backup before change.
- modify the corresponding xml files in /usr/compiz to change the behavior, remember to make backup file before change. And be careful.
- add all the compiz fusion related packages to package.mask to prevent from any modificaton.
- compiz-start and good luck. Check the error output in case the xml format is messed up.
APPENDIX:
/etc/X11/xorg.conf
Section "ServerLayout"
Identifier "Layout0"
Screen 0 "aticonfig-Screen[0]" 0 0
InputDevice "Keyboard0" "CoreKeyboard"
InputDevice "TouchPad" "AlwaysCore"
InputDevice "Mouse1" "CorePointer"
EndSection
Section "Files"
FontPath "/home/fonts"
FontPath "/usr/share/fonts/100dpi"
FontPath "/usr/share/fonts/cyrillic"
FontPath "/usr/share/fonts/wqy-bitmapfont"
FontPath "/usr/share/fonts/75dpi"
FontPath "/usr/share/fonts/default"
FontPath "/usr/share/fonts/misc"
FontPath "/usr/share/fonts/Type1"
FontPath "/usr/share/fonts/ttf-bitstream-vera"
FontPath "/usr/share/fonts/corefonts"
FontPath "/usr/share/fonts/zh-kcfonts"
FontPath "/usr/share/fonts/util"
# FontPath "/usr/local/share/fonts"
# FontPath "/usr/X11R6/share/fonts"
EndSection
Section "Module"
Load "freetype"
# Load "xtt"
Load "extmod"
Load "glx"
Load "dri"
Load "dbe"
Load "record"
Load "xtrap"
Load "type1"
Load "speedo"
EndSection
Section "InputDevice"
Identifier "Mouse1"
Driver "mouse"
Option "Protocol" "IMPS/2"
Option "Emulate3Buttons"
Option "ZAxisMapping" "4 5"
Option "Device" "/dev/input/mice"
EndSection
Section "InputDevice"
Driver "synaptics"
Identifier "TouchPad"
Option "Device" "/dev/input/mouse0"
Option "Protocol" "auto-dev"
Option "LeftEdge" "1700"
Option "RightEdge" "5300"
Option "TopEdge" "1700"
Option "BottomEdge" "4200"
Option "FingerLow" "25"
Option "FingerHigh" "30"
Option "MaxTapTime" "180"
Option "MaxTapMove" "220"
Option "VertScrollDelta" "100"
Option "MinSpeed" "0.09"
Option "MaxSpeed" "0.18"
Option "AccelFactor" "0.0015"
Option "SHMConfig" "on"
EndSection
Section "InputDevice"
Identifier "Keyboard0"
Driver "kbd"
Option "XkbModel" "pc104"
Option "XkbLayout" "us"
EndSection
Section "Monitor"
### Comment all HorizSync and VertSync values to use DDC:
Identifier "Monitor0"
HorizSync 31.5 - 64.3
VertRefresh 60.0 - 90.0
DisplaySize 331.8 207.3 ## for 15.4", DPI=98
EndSection
Section "Monitor"
Identifier "aticonfig-Monitor[0]"
Option "VendorName" "ATI Proprietary Driver"
Option "ModelName" "Generic Autodetecting Monitor"
Option "DPMS" "true"
EndSection
Section "Device"
Identifier "Card0"
Driver "radeon"
Card "ATI Graphics Xpression"
EndSection
Section "Device"
Identifier "aticonfig-Device[0]"
Driver "fglrx"
# BusID "PCI:2:0:0"
Option "DesktopSetup" "horizontal"
Option "VideoOverlay" "on"
Option "UseFastTLS" "2"
Option "EnablePrivateBackZ" "on"
Option "DynamicClocks" "on"
Option "XAANoOffscreenPixmaps" "true"
Option "TexturedVideo" "On"
Option "DRI" "true"
Option "MonitorLayout" "LVDS,AUTO" #Enable Externel Monitor
EndSection
Section "DRI"
Mode 0666
EndSection
Section "Extensions"
Option "Xvideo" "Enable"
Option "Composite" "Enable" ## critical
EndSection
Section "Screen"
Identifier "Screen0"
Device "Card0"
Monitor "Monitor0"
DefaultDepth 24
SubSection "Display"
Viewport 0 0
Depth 24
Modes "1280x800" "1024x640"
EndSubSection
EndSection
Section "Screen"
Identifier "aticonfig-Screen[0]"
Device "aticonfig-Device[0]"
Monitor "aticonfig-Monitor[0]"
DefaultDepth 24
SubSection "Display"
Viewport 0 0
Depth 24
Modes "1280x800" "1024x640"
EndSubSection
EndSection
Section "ServerFlags"
# Option "DontVTSwitch" "True" # kills the Ctrl+Alt+F(1-6) virtual terminal switch commands
# Option "DontZap" "True" # kills the Ctrl+Alt+Backspace command
EndSection
Sunday, October 12, 2008
Gentoo troubleshootings
After 3 and half days. I got gentoo upgraded on my acer 5102WLMi. Gentoo is a great distro. Love it. Now audio is working, but still not camera.
The Name:
The Name:
The Gentoo species is the fastest swimming penguin.Hardware specification
- Processors : AMD Turion 64x2 TL50 (1.60GHz, 512K L2 cache)
- Chipset: ATI RS480
- Displays: 15.4" WXGA (1280 x 800 resolution)
- Graphics Card: ATI Radeon Xpress 1100
- Optical Drive: DVDRW
- Sound Card: integrated, snd-hda-intel, realtek
- Wireless Networking: Atheros AR5005G 802.11abg
- MMC reader: ENE Technology Inc SD/MMC Card Reader
- I/O Ports : 3 USB 2.0, Audio jacks, 15-pin monitor connector, PCMCIA slot.
- Gentoo documentation
- audio setup: http://gentoo-wiki.com/HARDWARE_Acer_Aspire_5102WLMi
- articles with gentoo tag: http://kunxi.org/
- when upgrading, first emerge update all packages, resolve blockings(uninstall or upgrade, if circular blocking, --nodep). Then revdep-rebuild.
- use "equery" to look at installed packages
- gcc-config, kernel-config, etc to choose from different slots.
- make.conf, package.keywords, package.mask, package.unmask, package.use, ...
- if use "startx", add "gnome-session" to .xinitrc, else X will not load gnome.
- firefox+flash
sudo echo "net-www/netscape-flash" >> /etc/portage/package.unmasksudo emerge -av netscape-flash nspluginwrapper - firefox+mplayerplug-in (UPDATE: "emerge adobe-flash" will do the job)
sudo echo "net-www/mplayerplug-in -firefox divx quicktime realmedia wmp" >> /etc/portage/package.use## Make sure no browser running
sudo emerge -av mplayerplug-inln -s /usr/lib/nsbrowser/plugins/mplayerplug-in.so $HOME/.mozilla/plugins/mplayerplug-in.so - cp936 support is not default in kernel, so need to add support in kernel.
File Systems --->
DOS/FAT/NT Filesystems --->
Native Language Support - teTeX set up, "latex" does not come with the package automatically, seems there are a lot of high-level TeX users.
emerge -av tetex
texconfig confall ## check all the output
texconfig rehash
texconfig init ## will generate all other binaries: latex, omega,...
emerge -av app-emacs/auctex ## a must-have package for emacs+latex
emerge -av emacs-update ## as the package suggest - use TuxOnIce to do hibernate and hibernate-ram, just follow this HOWTO. Work like a charm. ATTENTION: if the lid-and-battery script is used, DO NOT put the code directly in `/etc/conf.d/local.conf'. It will run forever and will not act as a child. Instead, paste the script code into a file, say `/etc/lid_battery_suspend', do a
`chmod u+x /etc/lid_battery_suspend.sh', and then add one line`/etc/lid_battery_suspend.sh &'to `/etc/conf.d/local.conf'.
HOWEVER, after one suspend/hibernation, this script will be stopped and not be loaded. An alternative way is to let acpi take care of this. Look at/etc/acpi/eventsand change the actions for lid and battery. Then restart acpid service. Well, you take the risk. - clean gnome desktop, use gconf-editor (looks like register table in Windows), find apps \ nautilus \ desktop, uncheck, uncheck, uncheck. Nice pure wallpaper.
- HOWTO take compiz screen shot: open gimp, go to File > Aquire > Screenshot. You can set a delay of however many seconds to give yourself time to get the cube in the right position. Hold it there until the PC's speaker beeps.
- HOWTO_NTP, NTP (Network Time Protocol) is used to synchronize your system's time with an online server.
echo "net-misc/ntp caps" >> /etc/portage/package.use
emerge -av ntp
vi /etc/conf.d/ntp-client # can change the OPTS, change time servers
/etc/init.d/ntp-client start # start sync
#rc-update add ntp-client boot # optionalntp-clientis only a wrapper of ntpdate program. If need to sync automatically, need to startntpd. Ahh, before setting NTP, check /etc/localtime, if not in the right time zone, copy or link corresponding zone file from /usr/share/zoneinfo/. - (Nov 16,2008) Well, alsa packages(alsa-driver, alsa-lib, alsa-headers, alsa-util) 1.0.18 update is not working and I cannot figure out why, the sound card can not be found. So I downgraded back to 1.0.17, but the alsa-lib remains 1.0.18. And it's back to work! Mask them at once.
- "xauth: error in locking authority file /home/usrname/.Xauthority", will result in a dark screen with cursor usable after "startx", but nothing shows up. And the command window keeps prompting:
xlib: connection to :0.0 refused by X server
The solution is to use
xlib: no specified protocolxauth -b quit
to break existing lock, also check the permission of .Xauthority. - ati-drivers
fglrx(0): incompatible kernel module .......
update ati-driver, even with the ~ keyword - cannot
startx, the error showsSynaptics DeviceOn Called
Can't initialize SocketServer
Failed to initialize Panel Agent
It's probably because you have deleted or modified the/tmpdirectory, please check the permission of this directory, or just do asudo chmod 777 /tmp.
- The Problem: hibernate works under text mode. But under X mode, it resumes at the "Going Atomic" step and gives an error saying
another suspend already in progress? - The Solution:
The error in 'Going Atomic' is probably because you need to increase the
allowance we make for drivers allocating memory during the atomic copy.
Assuming you're using the hibernate script, this is done by editing
/etc/hibernate/suspend2.conf. If you cat /sys/power/tuxonice/debug_info
after an attempt at hibernating, the last line will say something like:

- Extra pages: 1069/500.

This means that 1069 pages were needed, but we only allowed for 500. In
that case, you'd want to add something along the lines of

ProcSetting extra_pages_allowance 2000

to /etc/hibernate/suspend2.conf.

(courtesy from http://lists.tuxonice.net/pipermail/tuxonice-users/2008-February/000202.html)
Wednesday, October 08, 2008
VIM tricks and tips
Efficient Editing With vim
Use Vim Like A Pro
Two important concepts in vi:
marks and registers.
marks: start with ` and '
ma        set mark '''a''' at current cursor location
'a        jump to line of mark a (beginning of line)
`a        jump to position of mark a
d'a       delete from current line to line of mark a
d`a       delete from current cursor position to position of mark a
c'a       change text from current line to line of mark a
y`a       yank text to unnamed buffer from cursor to position of mark a
''        jump back (to line where jumped from)
`0        jump to position in last file edited (when exited Vim)
``        jump back (to position where jumped from)
:marks    list all the current marks
registers start with ", use "* register to communicate with system clipboards.
There are nine types of registers:ATTENTION: 26 named registers, upper case is used to append contents, not different registers.
1. The unnamed register ""
2. 10 numbered registers "0 to "9
3. The small delete register "-
4. 26 named registers "a to "z or "A to "Z
5. four read-only registers ":, "., "% and "#
6. the expression register "=
7. The selection and drop registers "*, "+ and "~
8. The black hole register "_
9. Last search pattern register "/
registers manual
fast notes for registers:
When you copy and cut stuff, it gets saved to registers. You can pull stuff from those registers at a later time.
 :reg     - show named registers and what's in them
"5p      - paste what's in register "5
You can also record a whole series of edits to a register, and then apply them over and over.
 qk       - records edits into register k
      (q again to stop recording)
@k       - execute recorded edits (macro)
@@       - repeat last one
5@@      - repeat 5 times

"kp      - print macro k
      (e.g., to edit or add to .vimrc)
"kd      - replace register k with what cursor is on
Tips And Tricks
The * and # Keys
In normal mode you can use * and # to search for the word under the cursor. * search forwards, # backwards.
The . Key
Also useful is the . key. In normal mode it repeats the last change. Very useful for XML editing and where you have to do similar stuff.
The % Key
Pressing the % key in normal mode while being on a parenthesis or a similar construct jumps to the opposite parenthesis. There are a couple of plugins that extend that functionallity but the default behavior is usually good enough for most of the programming languages.
The <> Keys
When working with Python you often have to indent or outdent a couple of lines. Just mark them using the visual mode and press > to indent them. press 4< to outdent them 4 steps etc.
Advanced Undo Features
Vim has a different system of undoing changes. The normal undo is u in normal mode and ^r is redo. But what happens if you undo a few things and then change something? A normal editor forgets about the new changes. It's not possible to redo that again.
In Vim it's different. Vim starts a new undo branch. Using :undolist you can have a look at the possible undo states. With :earlier 20s / 1m / 2h you can then go back 20 seconds, one minute etc. Traveling forward in time works using :later and a timedelta as argument.
The Search Feature
I really like the firefox search feature. Just hit "/" and you can search in the current file and get the results in real time. That works with vim exactly the same. All you have to to is to either add :set incsearch into your vimrc or type it into the command prompt. Using n you can go to the next result. If you want to have all the search results highlighted use :set hlsearch. Hiding the results works using :nohl
Closing XML Tags
If you have the closetag.vim plugin installed (link above) you can add this to your vimrc in order to get the feature working: autocmd FileType html,xhtml,xml source ~/.vim/scripts/closetag.vim (update the path to your installation and your filetypes of course) Once this is done you can close open tags using ^_.
Regexp Replacement after Search
If you searched for a text using /foo and you now want to replace the found results with something you don't have to write this regexp again. Just do :%s/
Using Bookmarks
Bookmarking in vim is darn easy. If you are on the current line just bookmark it with mX where X is a lowercase letter from a to z. Go to that mark using 'X where X is the same letter again. Using '' you can jump back to the position you were before jumping to the bookmark. You can get the list of bookmarks using :marks.
The Vim File Browser
The Vim File browser is a nice thing. If you open a file using :e and that file is a directory you get a nice file browser for the files in that directory. If you are a python developer you probably want to filter some files out (*.pyc etc). Add this to your vimrc: let g:explHideFiles='^\.,.*\.pyc$' This hides pyc files as well as hidden files.
The Wildmenu
The best vim feature is the wildmenu. Add a set wildmenu to your vimrc and discover the possibilities of filesystem surfing ^^ Enter :e in the command line and press ^D. Vim will show you all possibitilites in a nice little window. By entering the start of a filename and pressing tab it completes for you then. If it was a folder you can now press ^D again to get the contents. Once you finished the command this window will disappear again and you can continue working. Works of course for all commands not only the open command.
Vim Completion Features
Last tip but maybe the most powerful one :). If you have vim7 and omni completion for your language you can use ^X^O to get the completion similar to intelli sense or how it's called. Note that the default color (pink) can be overridden in the theme. In my fruity.vim file i use this to get white letters on a dark red background: hi Pmenu guifg=#ffffff guibg=#cb2f27
Also nice is ^N. It looks up all used words in the open buffers and presents then in a dropdown completion. Useful if you have long variable names and don't remember them. Just type in the start of the variable name and press ^N. Vim will either complete it or show the list of possibilities.
Thursday, February 14, 2008
罗大佑 -- 告别的年代
告别的年代----罗大佑
风轻轻的吹,
夜沉沉的醉.
谁又在午夜的远处里想念着你,
远处的午夜的梦里相偎依
仰望着蓝色的天边的回忆,
好像你无声的临别的迟疑.
每一次手牵着手像在守护着你,
守护着仅剩的潇洒和犹豫.
每一次凝视的眼神的凝聚,
羽化成无奈的离愁的点滴.
道一声别离,
忍不住想要轻轻地抱一抱你.
从今后姑娘我将在梦里早晚也想一想你.
告别的年代,
分开的理由,
终不须诉说出口.
亲爱的让我快见你一面,
请你呀点一点头.
阳光里闪耀的色彩真美丽.
有声的无声的脸孔的转移,
有朝将反射出重逢的奇迹.
风轻轻的吹,
夜悄悄的睡.
夜沉沉的醉.
appendix:
Embedding Windows Media Player WMA
Tuesday, February 12, 2008
pdflatex and pdfpages are your friends
when you wanna insert multi-page external pdf files to the current latex file or merge several multi-page pdf files into one single pdf file.
- Refrash filename database
- teTeX
- Run:
texhash - web2c
- On a current web2c distribution,
texhashought to work; if it doesn't, runmktexlsr - fpTeX
- Click
Start->Programs->Texlive->Maintenance->Rebuild ls-R filenames databases, or open a "command" window and runtexhash - MikTeX
- On a MikTeX distribution earlier than v2.0, click
Start->Programs->MikTeX->Maintenance->Refresh filename databaseor get a DOS window and run:
initexmf --update-fndbOn a MikTeX distribution v2.0 or later, do:
Start->Programs->MikTeX 2->MikTeX Options, and press theRefresh nowbutton (Update filename databasein earlier versions of MikTeX).
Friday, February 08, 2008
宾克斯的酒 -- 热情海贼版本
尾田大神One Piece第488话, 宾克斯的酒, 热情海贼汉化,演绎版本按照沧海一声笑填词,挺好.
====[[[[宾克斯的酒]]]]====
演绎版本 哟霍霍霍霍 哟霍霍霍霍 送你杯,宾克斯的酒 离港口,莫回呀头 啦...啦... 送你杯,宾克斯的酒 雷电怒,风雨急 哟霍霍霍霍 哟霍霍霍霍 | 直译版本 哟霍霍霍 哟霍霍霍 X4 我给你送去,宾客斯的酒 再见了港口,纺织品之乡 - - 我给你送去,宾客斯的酒 暴风雨来了,海荒千里 哟霍霍霍,哟霍霍霍 x4 我给你送去,宾客斯的酒 我给你送去,宾客斯的酒 |
Tuesday, January 29, 2008
Saturday, January 12, 2008
Everything on Solaris 10 with a user account
If getting used to GNU/Linux, using pure unix is suffering. To make things worse, I only have a regular user acount. Hands are really tight. Not until now do I appreciate GNU tools, very smart and powerful.
1. make pdflatex.fmt
2. install AucTeX for emacs
note: if pdflatex is not working, to compile auctex, just open $auctex-install-dir/preview/latex/Makefile.in, and delete lines that test pdflatex.
3. make TAGS of linux kernel with i386 platform, under emacs
5. Funny. If adding "exec bash" in .cshrc, I cannot login to OpenWindows, while change it to "bash", everything is OK. Still wonder when it executes .cshrc.
6. read entire file using c:
1. make pdflatex.fmt
pdftex -ini -fmt=pdflatex.fmt latex.ltx
2. install AucTeX for emacs
./configure --prefix=/home/cps536-n1.07/elisp # install package
--with-lispdir=/home/cps536-n1.07/elisp # install auctex.el
--with-texmf-dir=/home/cps536-n1.07/texmf-local/ # put config in texmf
make; make install
note: if pdflatex is not working, to compile auctex, just open $auctex-install-dir/preview/latex/Makefile.in, and delete lines that test pdflatex.
3. make TAGS of linux kernel with i386 platform, under emacs
cd $Linux-kernel-dir;Useful hot keys:
find include/linux/ fs/ init/ ipc/ kernel/ lib/ mm/ net/ arch/i386/ -type f -iregex .*\.[csh] -exec etags -a '{}' -o kernel-TAGS \;
- M-. tag
- Find first definition of tag (
find-tag). - C-u M-.
- Find next alternate definition of last tag specified.
- C-u - M-.
- Go back to previous tag found.
- C-M-. pattern
- Find a tag whose name matches pattern (
find-tag-regexp). - C-u C-M-.
- Find the next tag whose name matches the last pattern used.
- C-x 4 . tag
- Find first definition of tag, but display it in another window
- (
find-tag-other-window). - C-x 5 . tag
- Find first definition of tag, and create a new frame to select the
- buffer (
find-tag-other-frame). - M-*
- Pop back to where you previously invoked M-. and friends.
__init tells GCC to put the function in a special section. These functions are
only used during booting, and are removed from memory after boot (see the
"Freeing unused kernel memory: 200k freed" or similar boot message.
5. Funny. If adding "exec bash" in .cshrc, I cannot login to OpenWindows, while change it to "bash", everything is OK. Still wonder when it executes .cshrc.
6. read entire file using c:
  fseek(input, 0L, SEEK_END);  /* Position to end of file */
lFileLen = ftell(input);     /* Get file length */
rewind(input);               /* Back to start of file */
fread(str, lFileLen, 1, input);
Saturday, December 29, 2007
2007 Xristmas in Dallas, TX
早就想着要去Dallas看阿燕, Thanksgiving忙的要死, 抽不出空, 就定在了Xristmas. 12.24-12.28的飞机. 玩得很开心啊, 现在顺利回来了, 小记一下.
24号中午的飞机, 本来应该2:20到, 结果飞机晚点半小时, 等行李又用了20多分钟, 出来后去租车, 由于是第一次, 手续烦琐, 耽误很久, 提了车, 按照GPS直奔阿燕家. 高速路上大货车换道跟玩似的, 更不用说其他的小车了, 坐在这辆陌生的新车上, 连左右后视镜都忘了调, 惊出好几身冷汗. 大概到5点钟才到, 不过是开到了邻居家, 下车让阿燕出来才找到的, 呵呵, 眼神不好. 看到阿燕清秀依旧, 立马想到以前我写在她毕业册上的话: "清水出芙蓉, 天然去雕饰", 还是非常非常的合适.
24,25号这两天是节日, 每个学校的中国学生们都会聚聚, 我就在他们那蹭饭, 享受大厨厨艺, 改善伙食, 认识那边的同学, 都是很有趣的人. 刚到阿燕家跟她聊天的时候, 说到从ohio过去, 好几次都把"坐"飞机说成了"开"飞机, 舌头停不下来, 糊涂的紧, 笑死了. 24号晚上还组织了一下"杀人", 偷懒当法官,几轮下来, 把他们的名字都记住了. 25号晚上接着跟去他们教授家包饺子, 胖胖的老头, 挺可爱的. 饭桌上听他们聊天, 确实内容和咱理工科不同, 聊政治,文化,法律,历史一套一套的, 其中还夹杂着笑话和调侃, 没冷过场, 这教授真神气啊.
26,27没有饭局了, free time. 刚好她们假期在家也都闷的慌, 就和她们出去转转, 去之前老板曾推荐San Antonio, 阿燕教授也推荐过, 可惜时间紧, 就打算往南开, 只去Autin和San Antonio, 如果再去Houston时间太紧, 就下次吧. 25号晚上规划好行程, 从网上预定了在San Antonio市区附近的旅馆, 记下第二天景点的地址并输入GPS, 26号早上动身.
从Dallas沿着高速往Austin开, 出了城市的立交桥后就是一片开阔地带, 路边几乎没有建筑, 高速偶有起伏, 绵延的车龙之外再无其他. 有些出口出去后什么都没有, 只有一片杂草地和稀稀拉拉的一些树, 真荒啊, 地广人稀用在这更适合. 想起听她们教授说Texas早年是罪犯们逃避法律制裁才会去的地方, 就跟澳大利亚差不多, 总算有些感受了. 1点左右抵达Austin, 这个城市的评价很好, The best small city in the States, 但首先的感觉是, 没有人. 街道空荡荡的. 先去州政府, Texas State Capitol参观, 造的跟Washington DC的Capitol Hill差不多, 圆顶, 顶上有个小雕像. 不过这个Capitol里面都是大星星, 听说是Texas的象征. 还听一个很干净的圆脸小胖子双手插裤带里介绍这个capitol的历史及现状, 讲的飞快, 嘚蹦嘚蹦, 讲好久都不换气的, 估计杨鹏难句对他就是小儿科了. 有点意思的是, 这个capitol里面1-4层的墙上挂着历届governor的画像, 最近的一个是小布什, 现任的州长等离任后会有个画像挂在最后, 然后其他的画像往前移一位, 一楼满了挂到二楼去, 一直到4楼, 这个过程需要4天的时间. 目前还有7个空位, 等7个空位都用完了, "We don't know what's gonna happen. "


小胖子讲解员
逛完Capitol, 接着去了一下UT at Austin, 很近, 只有几个街区, 不过相比capitol的喧闹, 那边就没有人了, 一条单行道有4车道, 但只有2辆车和一个老太太在路边等公交. 美国和中国在过年的时候很不同, 国内过年总是很热闹, 什么烟花晚会, 彩灯, 街上总是张灯结彩, 但这一到过年路上连个鬼都没有, 每个人都回家自己爽, 没有家的人就自己洗洗睡了, 或者搞出点动静免得太冷清. 当然也有很热闹的节日, 比如Halloween, 但感觉不一样的吧. 在UT at Austin只是逛了下钟楼, 事先调查不够.


这是George Washington的铜像, 就在钟楼正前方, 面向State Capitol. 这仨应该在一条中轴线上. 估计跟Wahsington DC学的, 那里Lincoln Memorial, Washington Monument以及Capitol Hill是在一条中轴线上.
离开Austin开往San Antonio, 晚上6点左右到达, check-in Days Inn, 就去downtown看夜景, 感受传说中的Riverwalk. 过去一看, downtown真小啊, 地图上的景观就集中在一点点地方, 古战场Alamo, Riverwalk, Tower of Americas等都扎堆. 夜景很漂亮, 很多彩灯, 还带闪的, 呵呵. 所谓的Riverwalk就是有条河通过市中心, 在水边走走, 晚上的时候其实就是听水声和看水边的灯饰了, 白天看那河水就挺脏, 完全没感觉. 到了第二天早上我们又去downtown逛了一圈, 两下一比较, 很多晚上看不到的东西白天就很清楚, 而很多晚上很赞的彩灯到了日光下就非常普通非常土, 赚了呀. 白天进古战场Alamo转了一圈, 上Tower of Americas俯瞰这个城市, 最后去了San Antonio zoo玩了一下. 关于动物园, 我在国内都没印象有没有去过, 但第一次看大熊猫是在美国, 是去年在Washington DC的动物园看的, 挺怪的感觉, 而且那时候那一对大熊猫还生了个小熊猫, 特调皮, 一个大妈管理员唠唠叨叨的跟我们讲他们的事情, 真是喜欢的不得了, 估计能讲一星期. 如果只考虑个体, 好像自己的生活挺特别的, 但如果放眼众生, 这点经历就完全没什么特殊的, 只是井底之蛙的些许碎念罢了.

San Antonio夜景, 后面的建筑不知道是啥.
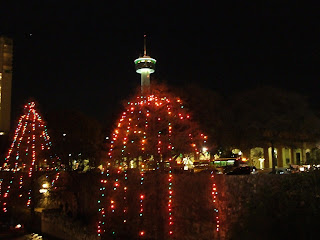
San Antonio夜景, 后面的塔是Tower of Americas.

在Tower of Americas上俯瞰.

在Tower of Americas所在的Hemisphere Park拍的风景, 都可以当桌面了, 处理了一下色调, 随便弄的, 有高手在的话指教一下.

动物园里的American bald eagle, 刚好转过头来让我拍了个正着, 再小小处理了一下, 呵呵.
24号中午的飞机, 本来应该2:20到, 结果飞机晚点半小时, 等行李又用了20多分钟, 出来后去租车, 由于是第一次, 手续烦琐, 耽误很久, 提了车, 按照GPS直奔阿燕家. 高速路上大货车换道跟玩似的, 更不用说其他的小车了, 坐在这辆陌生的新车上, 连左右后视镜都忘了调, 惊出好几身冷汗. 大概到5点钟才到, 不过是开到了邻居家, 下车让阿燕出来才找到的, 呵呵, 眼神不好. 看到阿燕清秀依旧, 立马想到以前我写在她毕业册上的话: "清水出芙蓉, 天然去雕饰", 还是非常非常的合适.
24,25号这两天是节日, 每个学校的中国学生们都会聚聚, 我就在他们那蹭饭, 享受大厨厨艺, 改善伙食, 认识那边的同学, 都是很有趣的人. 刚到阿燕家跟她聊天的时候, 说到从ohio过去, 好几次都把"坐"飞机说成了"开"飞机, 舌头停不下来, 糊涂的紧, 笑死了. 24号晚上还组织了一下"杀人", 偷懒当法官,几轮下来, 把他们的名字都记住了. 25号晚上接着跟去他们教授家包饺子, 胖胖的老头, 挺可爱的. 饭桌上听他们聊天, 确实内容和咱理工科不同, 聊政治,文化,法律,历史一套一套的, 其中还夹杂着笑话和调侃, 没冷过场, 这教授真神气啊.
26,27没有饭局了, free time. 刚好她们假期在家也都闷的慌, 就和她们出去转转, 去之前老板曾推荐San Antonio, 阿燕教授也推荐过, 可惜时间紧, 就打算往南开, 只去Autin和San Antonio, 如果再去Houston时间太紧, 就下次吧. 25号晚上规划好行程, 从网上预定了在San Antonio市区附近的旅馆, 记下第二天景点的地址并输入GPS, 26号早上动身.
从Dallas沿着高速往Austin开, 出了城市的立交桥后就是一片开阔地带, 路边几乎没有建筑, 高速偶有起伏, 绵延的车龙之外再无其他. 有些出口出去后什么都没有, 只有一片杂草地和稀稀拉拉的一些树, 真荒啊, 地广人稀用在这更适合. 想起听她们教授说Texas早年是罪犯们逃避法律制裁才会去的地方, 就跟澳大利亚差不多, 总算有些感受了. 1点左右抵达Austin, 这个城市的评价很好, The best small city in the States, 但首先的感觉是, 没有人. 街道空荡荡的. 先去州政府, Texas State Capitol参观, 造的跟Washington DC的Capitol Hill差不多, 圆顶, 顶上有个小雕像. 不过这个Capitol里面都是大星星, 听说是Texas的象征. 还听一个很干净的圆脸小胖子双手插裤带里介绍这个capitol的历史及现状, 讲的飞快, 嘚蹦嘚蹦, 讲好久都不换气的, 估计杨鹏难句对他就是小儿科了. 有点意思的是, 这个capitol里面1-4层的墙上挂着历届governor的画像, 最近的一个是小布什, 现任的州长等离任后会有个画像挂在最后, 然后其他的画像往前移一位, 一楼满了挂到二楼去, 一直到4楼, 这个过程需要4天的时间. 目前还有7个空位, 等7个空位都用完了, "We don't know what's gonna happen. "

Texas State Capitol 外景

穹顶内部

小胖子讲解员
逛完Capitol, 接着去了一下UT at Austin, 很近, 只有几个街区, 不过相比capitol的喧闹, 那边就没有人了, 一条单行道有4车道, 但只有2辆车和一个老太太在路边等公交. 美国和中国在过年的时候很不同, 国内过年总是很热闹, 什么烟花晚会, 彩灯, 街上总是张灯结彩, 但这一到过年路上连个鬼都没有, 每个人都回家自己爽, 没有家的人就自己洗洗睡了, 或者搞出点动静免得太冷清. 当然也有很热闹的节日, 比如Halloween, 但感觉不一样的吧. 在UT at Austin只是逛了下钟楼, 事先调查不够.

钟楼前合影, 到此一游的证明.

离开Austin开往San Antonio, 晚上6点左右到达, check-in Days Inn, 就去downtown看夜景, 感受传说中的Riverwalk. 过去一看, downtown真小啊, 地图上的景观就集中在一点点地方, 古战场Alamo, Riverwalk, Tower of Americas等都扎堆. 夜景很漂亮, 很多彩灯, 还带闪的, 呵呵. 所谓的Riverwalk就是有条河通过市中心, 在水边走走, 晚上的时候其实就是听水声和看水边的灯饰了, 白天看那河水就挺脏, 完全没感觉. 到了第二天早上我们又去downtown逛了一圈, 两下一比较, 很多晚上看不到的东西白天就很清楚, 而很多晚上很赞的彩灯到了日光下就非常普通非常土, 赚了呀. 白天进古战场Alamo转了一圈, 上Tower of Americas俯瞰这个城市, 最后去了San Antonio zoo玩了一下. 关于动物园, 我在国内都没印象有没有去过, 但第一次看大熊猫是在美国, 是去年在Washington DC的动物园看的, 挺怪的感觉, 而且那时候那一对大熊猫还生了个小熊猫, 特调皮, 一个大妈管理员唠唠叨叨的跟我们讲他们的事情, 真是喜欢的不得了, 估计能讲一星期. 如果只考虑个体, 好像自己的生活挺特别的, 但如果放眼众生, 这点经历就完全没什么特殊的, 只是井底之蛙的些许碎念罢了.

San Antonio夜景, 后面的建筑不知道是啥.

San Antonio夜景, 后面的塔是Tower of Americas.

在Tower of Americas上俯瞰.

在Tower of Americas所在的Hemisphere Park拍的风景, 都可以当桌面了, 处理了一下色调, 随便弄的, 有高手在的话指教一下.

动物园里的American bald eagle, 刚好转过头来让我拍了个正着, 再小小处理了一下, 呵呵.
27号晚上8点回的家, 挺顺利的. 28号早上在抓紧时间参观了一下SMU, 吃到阿燕做的菜了, 很不错. 中午坐飞机回了ohio. 假期结束.
总体来说, 玩得挺开心, 就是时间太短, 买机票的时候根本没想过去哪玩, 只是到了之后一个晚上定的行程, 两天不太够, 下次要早规划. 自己开车很省钱, GPS帮了大忙, 否则我们就死在那了. 由于时间短, 本来打算去tamu看shanhaier改善伙食, 没去成, 太可惜了. 下次吧. 不过见到了阿燕和她的同学们, 看他们过的都挺好, 身体健康, 精神生活也挺充实, 教授很照顾, 嗯, 很好很强大.
2008年就要到了. Happy New Year! 新的一年会有新的气象的. 一切都会好的.
总体来说, 玩得挺开心, 就是时间太短, 买机票的时候根本没想过去哪玩, 只是到了之后一个晚上定的行程, 两天不太够, 下次要早规划. 自己开车很省钱, GPS帮了大忙, 否则我们就死在那了. 由于时间短, 本来打算去tamu看shanhaier改善伙食, 没去成, 太可惜了. 下次吧. 不过见到了阿燕和她的同学们, 看他们过的都挺好, 身体健康, 精神生活也挺充实, 教授很照顾, 嗯, 很好很强大.
2008年就要到了. Happy New Year! 新的一年会有新的气象的. 一切都会好的.
Saturday, November 03, 2007
GRE CS SUB @ Univ. of Cincinnati, Nov 3, 2007
先说一下行程, 考试日期是周六, 上个周日拉着师兄和vicky去了一趟华欣,Cincinnati的中国超市, 算是练练车, 跑跑I-75S. 周二在UD论坛上发帖看看谁在那边有没有同学可以借宿一晚, no luck. 周四在google maps上找了几个motel, 打了一个电话, 说没有reservation, 到时候会有房间的, 就不接着预约了. 然后在google maps上找路, 打印相关UC附近的地图, 定位motel, 确定路径. 周五下午meeting完了后回家收拾东西, 解决了车子remote不好使的问题, 直接废掉alarm, 只用钥匙. 4点半左右上高速了.
高速上一切顺利, 开了大概有一个多小时吧, exit 14至exit 6还堵车, 等了好一会, 终于出去了, 结果一出高速就转错弯, 与既定路径相反, 开了一会看不对了, 幸好看到了一条返程时要走的路, 对照地图, 七转八转终于方向走对了, 也知道怎么走了. 那一片区域路绕来绕去, 而且很多上坡下坡, 大弯一个接一个, 开的心惊胆战的. 这时想起GPS的好来了, 地图上看路径是清清楚楚, 但实际开的时候根本看不清, 如果看清了该转了, 已经被逼在直行道上. 如果带了老戴的GPS应该好很多, 不过目前我还不太会用, 下次吧. 这样经过UC, 开往地图上找的几个motels的位置, 上陡坡, 转大弯, 下陡坡, 到了一个大路口, 四五个方向分的很远, 而且不是直来直去, 没有路牌, 完全晕了, 往前吧, 不认识路了, 往回开, 按照记忆转了个弯, 突然发现前面是一个motel candidate, Rest Inn, 误打误撞找到了, 哈哈. 原来我来的路跟这条路只有30度左右, 实在是大弯. Rest Inn就是两层的房子, 方方正正, 一个一个房间整齐的排列着. check in, 65刀, king-size bed. 其实应该选queen size或更小的, 不过当时没意识到, 那个老板娘就直接定了, 懒得换了. 放好包, 确认了一下去UC的路, 就动身探考场.
UC是在山上, 跟这一片的地形相符. 路上感觉Cincinnati的车好多, 而且路边都停满了车. 路边有计时码表, 靠边, 上山了. UC比UD大气, 建筑分的很开, 中间是大片的绿色和纪念标志什么的, 应该设计过. 一幢幢楼都挺有特色, 有的现代一些,灰色砖瓦加玻璃墙, 有的古典一些. 土黄色方方正正门牌类. 我看的是west campus吧, 感觉就比UD大一点, 中心还有一个橄榄球场, 挺像模像样的. 在路上走一会就看到好几个中国人, 出现频率高多了. 考场在Braunstei Hall RM 300, 一个阶梯教室. 看完天都黑了, 回去吃饭休息.
晚上想看看资料, 打开包竟然找不到笔记本, shit! 带了电源没有带笔记本! 真是糊涂到家了. 只能把practice book里的例卷做了, 70道选择题, 累死了, 明天还要考2小时50分钟, 体力活.
这里讲讲准备情况, 补看了几本书, Hardware, Computing theory, Algorithms, 还看的不全, 没有系统准备过, 例题只做了一小部分. 做了practice book后发现, 题目不是很难,但涵盖的知识点很广, 而且一个不小心就错了. 基本上是做的时候还挺开心的, 一对答案就完了. 就这样打发了大半个晚上, 再浏览了一下算法导论中的图论, 看了一会电视, 大概12点半熄灯, 到了1点多才睡着, 可能床太生. 早上醒过几次, 6点起, 外面还是黑的, 大清早挺冷的, 但已经有人在走动了, 真行. 准备去吃早饭, 结果发现Big Boy 7点钟才开门, 背啊, 回房捱到时间, 吃饭, check out, 出发, 找到加油站的一个停车位, 走到考点, 考试, 考完开车回家, 总算还顺利.
尽人事, 信天命. Move on.
Subscribe to:
Posts (Atom)